 |
| One big, heavy jigsaw |
As the
John Gray is getting on a bit, we thought it prudent to
clean up the steel under the floor. Especially seeing as she's been
holding water for some time and the paint that was protecting the steel
from the inside is no longer doing so. Also the existing floor was rotting in parts, had no insulation, and wasn't properly supported when we bought the boat so we decided to have it all up and re-lay the floor, with supports at 600mm centres and slab insulation between the bearers. But before any of that could go down, we had the joys of playing the heaviest jigsaw puzzle ever.
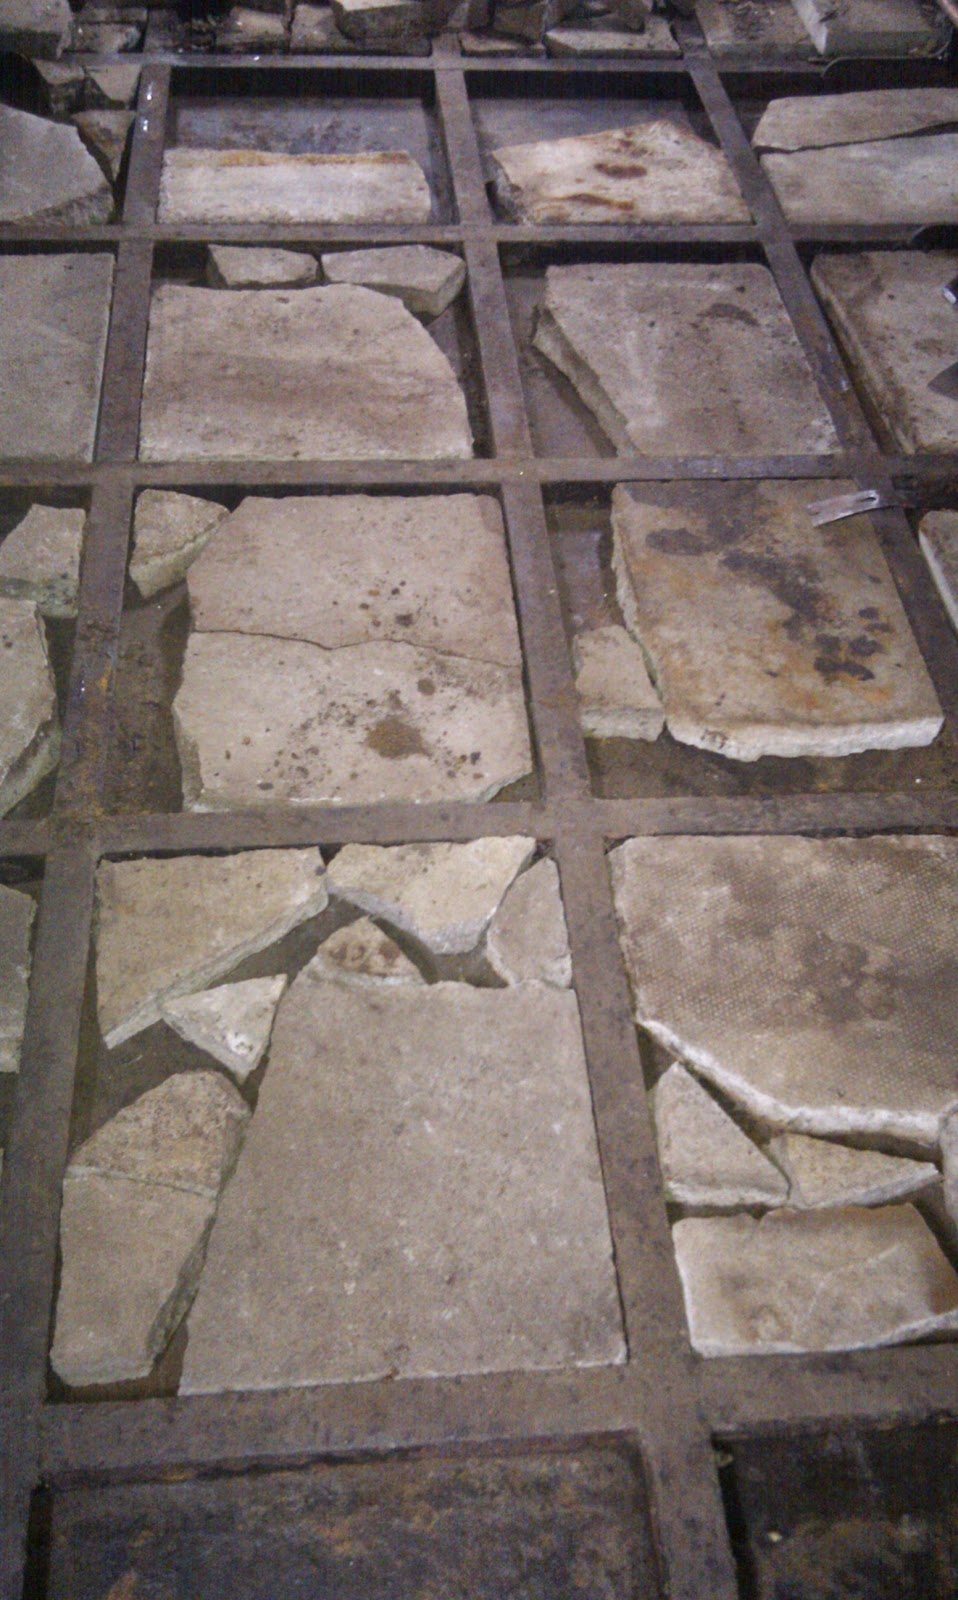
We spent the best part of a week lifting ballast, scraping off old
bitumen, sweeping out random debris, repainting the base plate, and
beginning to rebuild the floor. As we have to store tools, materials, rubbish, etc on the boat, we decided to do half of the floor at a time,
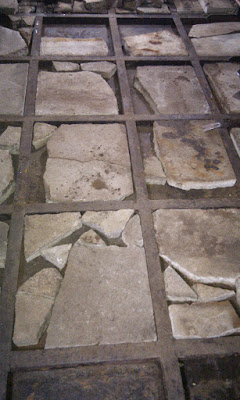
which allows us some storage space and some working space. Our ballast consists of paving slabs of
varying sizes weighing anything from "I could carry this all day, what's all the fuss
about" to "Oh my god I have to put this down before I rupture something!", which makes up a pretty
heavy jigsaw puzzle. All of this had to be lifted up and cleaned off so that we could clean up under the floor, repaint and then re-lay the ballast.
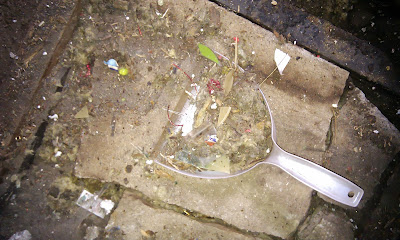 |
| Where does this all come from? |
There was a suprisingly large amount of dust, wood, and general detritus under the floor so clearing this out was a good idea as it would improve airflow through the bilge, allowing any water that condenses to evaporate rather than pooling and creating rust, and eventually, holes in the base plate. As we cleaned we also found a suprisingly large amount of things that must have slipped through the floor boards: Playing cards (not a full deck), marbles (perhaps belonging to the same person who is now a few cards short of a full deck?), a screw driver, a toy dinosaur (Brachiosaurus, if I'm not mistaken), screws, several coins (mostly coppers but a couple of silvers and even one 50p, a couple of 20 centimes, but mostly pennies), and a salt spoon amongst several other uninteresting items. And pencils. If you've ever lost a normal pencil (black and yellow, Steadtler, HB jobbie) I've found it, it was under my floor.
 |
| One bay painted, one bat ready for painting. |
It took two of us a week to prepare the rearmost six metres of floor.
The preparation took the most time, scraping off old bitumen and
sweeping it up because you can no longer see what you're scraping,
scraping more, sweeping, scraping, sweeping, sweeping, sweeping... You
get the idea. It's absolutely filthy work and we both ended up becoming
very tanned despite not spending any time in the sun. Unfortunately it
was the sort of "tan" that washes off.
 |
| Insulation is screwed to the underside of the hatch |
|
 |
| The frame goes onto the hatch. |
 |
| Adding the handles to enable the hatch to be lifted out. |
 |
| Floorboards get screwed into place. |
Once this was completed we could start making ourselves some floor! Timber bearers were laid across the boat at 600mm centres, conveniently resting on the steel angle welded to the baseplate. we used treated pine, 1800 x 115 x 45mm towards the rear of the boat to raise the level of the floor allowing for more ballast under this section. To make the framework rigid we ran 45 x 45mm timbers lengthways and recessed these into the bearers to create a solid, flat base for 12.5mm ply to lay on. Finally on top of the ply we have our floor boards which are screwed down rather than nailed. Ever tried to pull up a floor board that's been nailed down without either swearing or splitting the board? I have, and I know it's a lot harder than undoing a few screws. Hopefully we won't ever have to lift large sections of the floor, but the well known law of Sod will ensure that if it can go wrong, it will do so at the worst possible moment. So I'm being cautious.
 |
| Bearers start to go down. |
In the gaps between the bearers we added insulation which is not something many narrowboats have but more modern ones do tend to. We used 50mm Xtratherm slabs as that's what they had at our local BuildBase and they have the same U value as both Celotex and Kingspan. All of the joins and timber bearers were covered in aluminuim tape to create a vapour barrier and ensure there are no gaps in the reflective surface. 12mm Ply is then laid over the bearers to proved a good base for the floor boards to go onto.
 |
| We're almost there! That hatch itself is completed. |
Many narrow boats don't have any access into the bilges from above without lifting the floor completely. Not something you're going to be doing simply to check if you think you may have a leak somewhere, so we are building hatches into certain areas of the floor that we know won't be covered by cupboards, beds, kitchen sinks, etc. Hopefully this will encourage us the check on the state of our bilges periodically so we can ensure that that are clean and dry.
 |
| Where the bathroom meets the kitchen. |
Our bathroom will be in a wet room style so we used marine ply for the floor under the bathroom abd have built our shower tray already! Marine ply is a high quality ply that will resist rotting if it gets wet. Hopefully this should never happen, but remember Sod? We're not taking any chances. In the photo below you can see the shower tray (the overexposed bit is the corner of the tray) and some of the rest of the bathroom floor.
So there you have it, you now know far more than you needed to about our floor. You might have found this post boring, but (prospective employers take note) I've applied my problem solving skills, learned new skills (I'm not sure when the last time I used a chisel before this was, 10-12 years ago, more?), applied myself, and worked bloody hard so I'm pretty pleased with the result. To get the whole floor sorted has taken us a long time, pretty much the whole summer, but the work was necessary and will extend the life of the boat and make it much warmer with the added insulation. Now the real work can begin!
 |
| The completed hatch in its frame on the floor. |


No comments:
Post a Comment